The Customers Form allows you to search for a registered customer, so as to view or edit his data attributes and location. You can also use the Customers Form to make new customers registration or to manage in advance level the stored information.
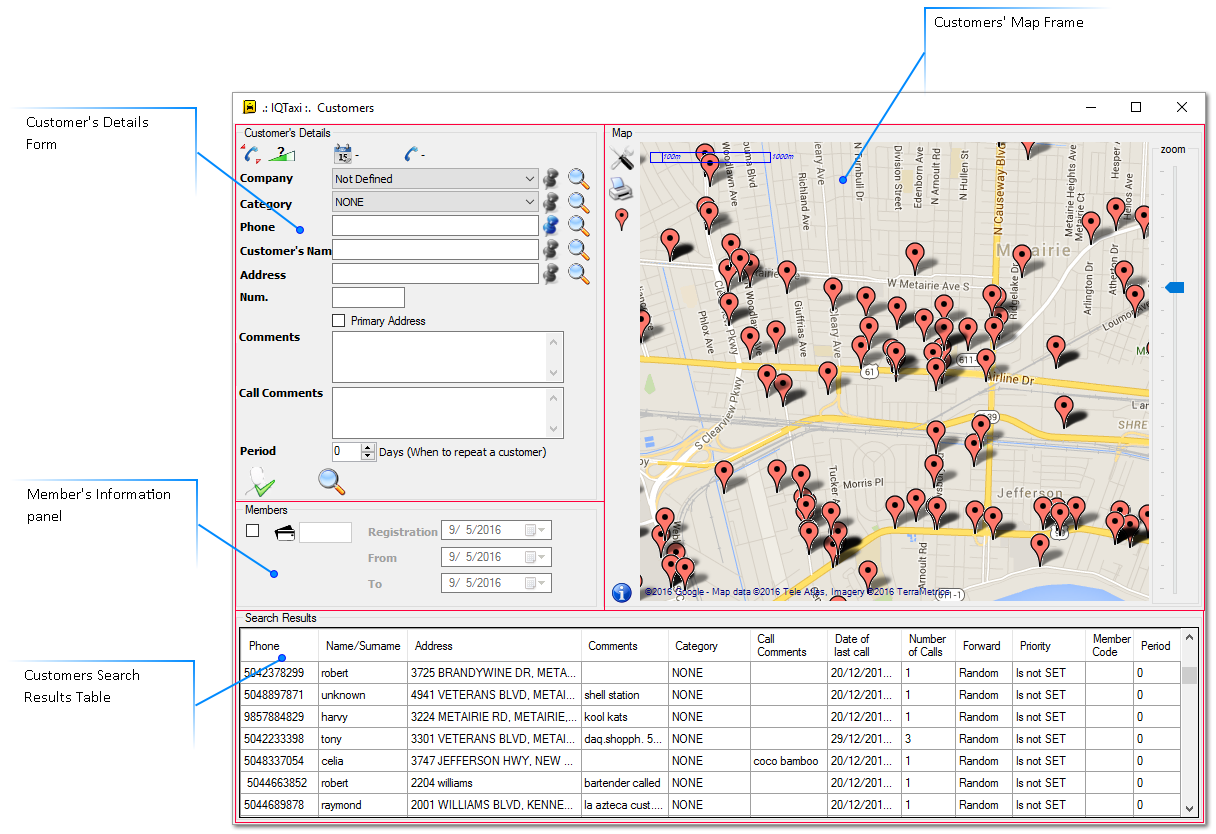
Customer Details form
In the Details form are placed all the appropriate tools and input fields that needed to create, edit
and search your customers. Working on this form you can add new customers, edit the information
of the selected customer and apply search filters for advanced searching based on criteria.
Description of input fields
|
|
Sets the customer priority from 1 to 10.
|
[slider bar]
|
i.e. 5
|
|
The date of the customer's last call
|
[auto- filled by the system]
|
i.e. 21/01/16
|
|
Shows the total number of the customers calls until that moment
|
[auto- filled by the system]
|
i.e. 1
|
Company:
|
The company name that the customer belongs to. Select from the list with the registered companies.
|
[dropdown list]
|
i.e. ATE Inc
|
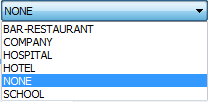
Category:
|
Customer category. Select a predefine category from the list.
|
[dropdown list]
|
i.e. Hospital
|
Phone:
|
Customer's phone number
|
[number]
|
i.e. +003069123456
|
Customer's Name:
|
Customer's name
|
[text]
|
i.e. John Smith
|
Address:
|
Street name
|
[text]
|
i.e. 1920-2016 Harvard Ave.
|
Number:
|
Street number
|
[number]
|
i.e. 1920-2016
|
Primary Address:
|
Indicates if the specific address is the customers primary address or not
|
[check box]
|
i.e. Yes/No
|
Comments:
|
general comments concerning customer
|
[text]
|
i.e. preferred car type
|
Call Comments:
|
comments concerning specific call
|
[text]
|
i.e. call on arrival
|
Period:
|
Sets the period (number of days) into which the customer cant be served from the same driver.
The zero (0) value stores the systems default.
|
[number]
|
i.e. 3
|
|
Apply a search filter based on the field's value.
Blue--> active
Grey--> inactive
|
|
|
|
Save the new customer to the system
|
|
|
|
Update the customers data after editing
|
|
|
|
Search for Customers based on filters or not
|
|
|
|
Register a second address to the same customer
|
|
|
|
Delete the second address has been stored to the customer
|
|
|
|
Merge customers data
|
|
|
|
Member Information panel
Is very common for car bases or companies to provide special services to their customers under
membership subscription. To handle member subscriptions you must activate the member
information panel and add the required information according to your membership rules.
Description of input fields
|
|
Activates the Members form for data entry
|
[check box ]
|
i.e. On/Off
|
|
Indicates the member's type and status.
Member type( Click on the icon to change): Silver / Gold
Subscription status: Valid / Expired
|
[Icon]
|
|
|
The member's number box
|
[Number]
|
i.e. 10
|
Registration:
|
The date that the customer is registered as a Member
|
[Date]
|
i.e. 21/01/16
|
From:
|
Refer to member's subscription period. Give the date that subscription starts.
|
[Date]
|
i.e. 18/05/16
|
To:
|
Give the day that subscription expires.
|
[Date]
|
i.e. 18/06/16
|
|
Customers Search Results Table
The Information table is a search results table that displays the stored data of selected customers.
The table updates it's records after a searching procedure and based on the applied filters. The
table consist of twelve columns that regards to the database fields and many rows, one for each
customer. The first row in the table displays the Field name of each column.
Data Sorting
The table's records are by default sorted based on the "Phone" field values (system default). If you
want to make a shorting based on an other field's data, you have to click once on the column's
name you desire. The sorting is automatically changed and an arrow appears on the selected
field, marking it active.
|
The direction of arrow indicates whether the sorting is in ascending or descending order . By clicking on the selected field header, the sorting can be changed from ascending to descending and vise versa.
|
Customer Selection from table
You can select a customer's record from the information table by double clicking on it. After selection,
the customer's information are stored on the Details Form and the map navigates (zoom in) to customers
location. You are able to edit the selected customer information on Details Form and save the changes
to the system.
|
Map Frame
This frame displays a dynamic geographic map, extending usually over the service area of the car base that has been defined at the installation process. You can use the map to view the customers locations (address) or to point out the location of a new customer.
The customers locations are indicated on the map with the red pointers. To show or hide the pointers on the map chick on the "show points on the map" icon , on the upper left side of the frame.
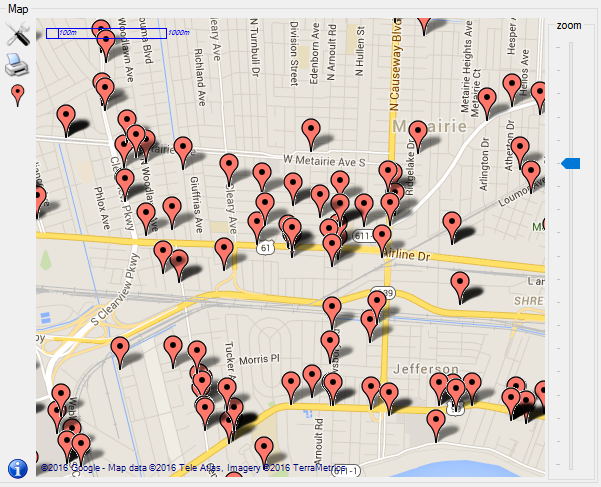
The map frame supports four different map providers (Google, Yahoo, Bing, Open Street) allowing you to select the one you prefer for data viewing. You can select the map provider or switch between the available, clicking on the "map type" icon on the upper left side of the frame. Each provider has available three different map types to select, Road map, Satellite map and Hybrid map.
You can interact with the map and navigate to different map areas using your mouse with the following actions.
Zoom In /Out
|
|
Roll mouse wheel back and forth
|
Pan
|
|
Hold down left-click and drag
|
Add point
|
|
Right-Click on a specific location on the map
|
Return pointer address
|
|
Push down mouse wheel
|
To print a specific map view, click on the "print" icon on the upper left side of the frame.
To show or hide the
|
|