Serving a new incoming Call
To serve a new incoming call there are two options.
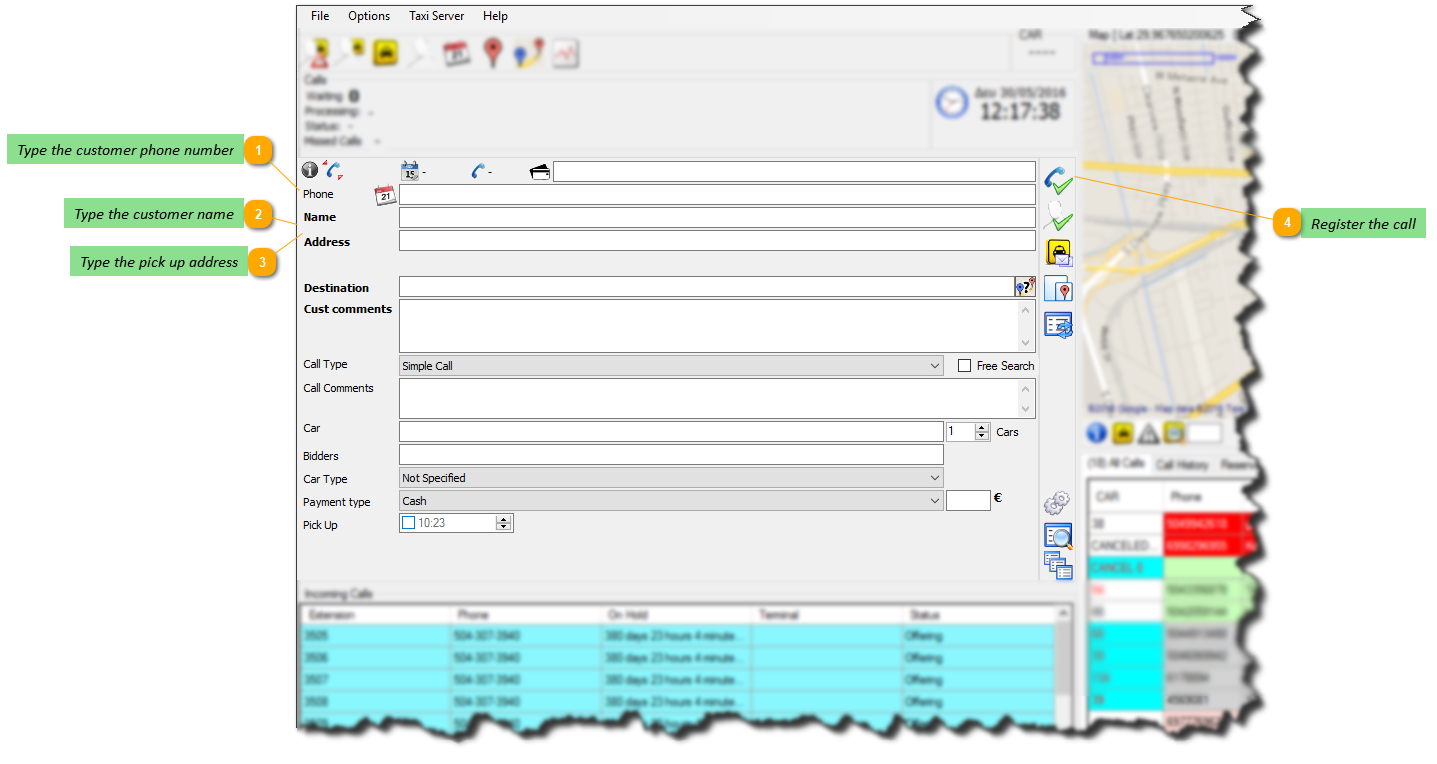
1. Mandatory fields.
2. Extra fields
Also have in mind that serving a call either it will be a new customer or an existing (stored) customer.

The following fields are mandatory:
|
Here there are two choices depending whether call center is connected to your telephone system
to receive caller id or not.
1. Connected: The telephone number of the customer will be displayed once you answer the call
from the Incoming/Missed Calls frame (6). There is no need to type in the telephone number. In
case the customer phone number is not identified or blocked a telephone number is mandatory
to register a new call. To answer a call just double click or use the specific shortcut to answer
the waiting incoming call from the list.
2. Not connected: You must type in this field the customer telephone number. When done press
the Enter key on your keyboard to retrieve the customer data. If the customer is new when you
press the Enter key the customer phone number field will turn yellow.
|
|
Select the save button in the call management toolbar to register the call.
Alternatively you can register the call by pressing the Page Down button on your keyboard, which is a shortcut.
|
|
|
Important From the options menu you can activate the autosave new customer option. That way new customers won't need to be saved prior to registering the call. They will be saved automatically.
|
After this step the call is handed to the dispatch routine run by the Taxi Server.
You can monitor the call status in the All Calls Tab.
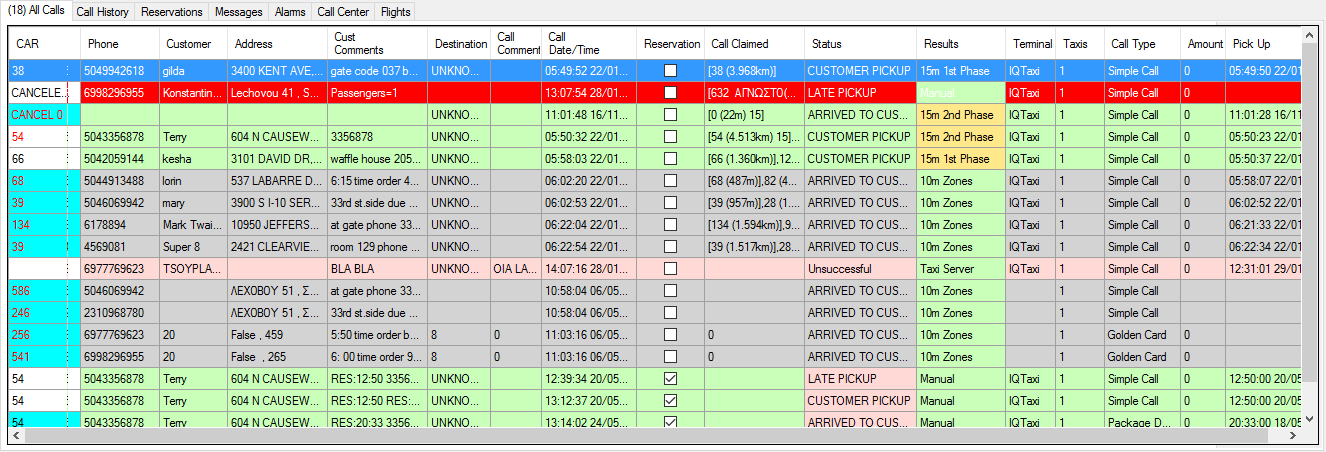
To ease the load, colors are used to easily identify call status. Those are:
|
Green
|
->
|
Successful Completed Call
|
|
Red
|
->
|
Cancelled Call
|
|
White
|
->
|
Unprocessed Call
|
|
Pink
|
->
|
Unsuccessful Call
|
|
Blue
|
->
|
Selected Call
|
|
Grey
|
->
|
Call on Process by the dispatch server
|
And can be viewed in the All Calls Tab table:

When the driver designates via his application that he picked up the customer for a registered call that he was designated by the system to serve it, then the call automatically is transferred from the All Calls Tab to the Call History Tab.
At this point your job for the specific call is ended.
Canceled or Unsuccessful call entries remain to the All Calls Tab waiting for action to be taken.
Once there is no action to be taken you can transfer each entry to the Call History Tab manually by selecting one entry and pressing Ctrl+PageDown on the keyboard.
The rest of the fields in the Call Management Form are optional and can be used freely according to your company requirements.